PDF version of this article: microservices-gitlab-ci-cd-development-guide.pdf
The sample solutions proposed during the workshop were created to demonstrate how to create complex DevOps pipelines. During the workshop, you’ll also create your own, simplified version of this process. We’re focusing on microservices here because working with them is significantly more complex than working with a monolith.
Everyone who is a part of the project development team should find something interesting here do not matter if a main focus of this person is development, qa, or operations.
Agenda
-
Start 10:00
-
Section 1:
-
Architecture Overview
-
Gitlab Overview
-
Frontend Service Pipeline Overview
-
Backend Services Pipelines Overview
-
Gitlab Container Registry Overview
-
Gitlab Pages Overview
-
Gitlab CI Overview
-
-
Coffee break 11:00 - 11:15
-
Section 2:
-
Your first pipeline (practice + explanation)
-
A complex pipeline (practice + explanation)
-
-
Coffee break 12:10 - 12:25
-
Section 3:
-
DevOps pipeline for our frontend microservice (demo)
-
DevOps pipeline for our frontend microservice (explanation)
-
-
Section 4:
-
DevOps pipeline for our backend microservices (demo)
-
DevOps pipeline for our backend microservices (explanation)
-
-
Lunch 13:45 - 14:15
-
Section 5:
-
Component use training (optional)
-
-
Coffee break 15:45 - 16:00
-
Section 6:
-
What’s Next
-
Cleanup
-
Q&A
-
-
Ends between 16:15 and 16:30 - depends on Q&A session
Requirements
For this Workshop you will be working as a DevOps automator this role can be granted to anyone in the team. In most of the cases or a Developer is chosen or a QA automator but in some cases this role can be given to the Cloud Infrastructure Engineer.
Because we will be working on FrontEnd example during this workshop and also focusing on the local development part of it then our requirements are the same as for this example project local development requirements:
-
Languages
-
JavaScript (programming language used for our example project)
-
Ruby (documentation)
-
Python (automation and mocks)
-
-
Services
-
Docker CLI, Docker Engine / Colima / Podman, Docker Compose / Podman Compose, Docker BuildX (containers)
-
-
Tools
-
Brew (package management)
-
Ansible (configuration management)
-
docker-compose (container management)
-
kubectl (kubernetes cli)
-
kubectx (kubernetes cli extension)
-
helm (kubernetes package management)
-
k3d (lightweight kubernetes)
-
k9s (kubernetes management tool for cli)
-
gitlab-runner to prepare Gitlab CI executor
-
You can find how to install this software here: https://local-workshops-requirements-guide-b9c7de.gitlab.io
Windows users should use WSL 2, or install VirtualBox, and install linux system in the VM.
Gitlab CI required runners to work. The current version of this workshop requires two runners working on your laptop/desktop/server - you can decide where yourself. First one which will be a default runner and working for untagged jobs will be a Kubernetes based runner. There is a special guide showing how to configure it here: https://gitlab-runner-k3d-guide-1aca27.gitlab.io. Second runner will be a shell runner and in our case this will be bash runner - this one will be configured for jobs I prefer to use it in our example.
|
If you like to check overview of the pipeline created by Gitlab itself you can find it here: CI Overview v1, but unfortunately it was created at 2020, and I do not see never version of it. A lot changed, and we will focus on the new additions to the process. You can also do a short Gitlab training by creating a simple Python project using Gitlab Infrastructure prepared by us Python GitLab CI-CD development - guide prior this one or after this one. |
Why those requirements
Like mentioned in this workshop you need all of this software installed but in the real life not.
JavaScript programing language will be used normally only by Developers. Testers and Infrastructure in most of the cases do not need it to be installed.
Ruby programing language in our case also will be used normally only by Developers and in this example they do not need to be Ruby programmers - tool we are using here for the documentation creation requires it. We expect developers to be responsible for documentation creation and maintenance.
Python programing language is used here by a Developers and QA. It will be easy to remove this need for the Developers just by serving doc not with using python but with using ruby. QA will need this language to work with our MOCK examples.
Brew tool is required in our setup only if you will choose this tool to install almost all required software.
Ansible is the configuration management tool will be used by all groups as our flow is based on it.
Docker Engine - For Linux and Windows users (WSL2) Docker Cli is part of the Docker package. Mac users needs to install a replacement like for example Colima. It is used by the Docker CLI to physically manage containers.
Colima - This is low weight Container Engine compatible with Docker Cli. In our case Mac users using it instead of the Docker Engine which currently is available on Mac only through paid Docker Desktop.
Podman - Podman is an open source container, pod, and container image management engine. Podman makes it easy to find, run, build, and share containers.
Docker Compose / Podman Compose - Easy to use simple orchestration tool for managing and configuring multiple containers.
Docker BuildX - This is a Docker CLI plugin for extended build capabilities with BuildKit.
All those tools:
kubectl - Kubernetes CLI will be used to check if our cluster works
kubectx - CLI tool extending kubeclt is used by our local deployment script to be sure that proper cluster and namespace is used.
helm - Package manager for Kubernetes used to deploy applications to our kubernetes cluster.
k3d - CLI wrapper for the K3s clusters which we will use to create out local kubernetes compatible K3s cluster
k9s - terminal based UI to interact with Kubernetes clusters
will be used mostly by the Infrastructure but also in many times by Developers and QA when working with Continuous Deployment.
Overview
Architecture
Our target backend architecture will be looking like this:

We have three backend microservices prepared which we will be used by our deployed application:
-
Our BFF Service will be simulated with Book API Gateway Service.
-
Our API-1 Service will be simulated with Book List API Service.
-
Our API-2 Service will be simulated with Book Admin API service
Locally for a simplicity we will be using Mocked version of the Backend infrastructure. In this particular case we have mockup service which we created ourselves but there are automated solution for this in the market.
In our example we have BFF Service which depends on API-1 and API-2. Like we can see below when using mocks our architecture can be simplified a lot:

-
API-1 is like mentioned before mocked with Book List Mockup API Service
-
API-2 is also like mentioned before mocked with Book Admin Mockup API service
As you can see this will help our teams to test and work on services which depends on other services. With this design you do not need to recreate full architecture with all dependencies to just work.
Our mockup services are created using Python[1] language. In addition, for maximum simplicity we are using also Flask[2] micro framework.
We will be using those mocked versions of our services also in our E2E tests.
For simplicity we are naming our Stubs as Mocks as this name is in most of the cases used for Fakes and Stubs all the time.

Fake: Implements a shortcut to the external service, for example in memory database instead real database. This method of mocking requires changes in the code.

Stub: It is a hard coded version of the external service and our examples are in the reality Stubs.

Mock: We use mocks only to verify that access was made. Mocks do not hold data.
In the end our full architecture on the staging and production environment looks like this:

-
Our FrontEnd Service will be simulated with Book Frontend.
In the upper target system which will be available on the staging and production environments our frontend is talking through the Ingres with our BFF Service which is operating in the fully working environment. We will be deploying our services with the help of the CI/CD Pipeline to those environments.
Locally we will be working with the mocked version of this architecture which will be looking like this:

As you can see, microservices-based architecture poses many challenges in the CI/CD process, which we will attempt to address during this workshop. Some of these challenges haven’t been addressed in my workshops to date, as they require a specialized testing platform due to their complexity.
If possible, before starting a project, try asking your architects WHY they need microservices in the first place.
Gitlab
Each project in the Gitlab system have a Project menu:
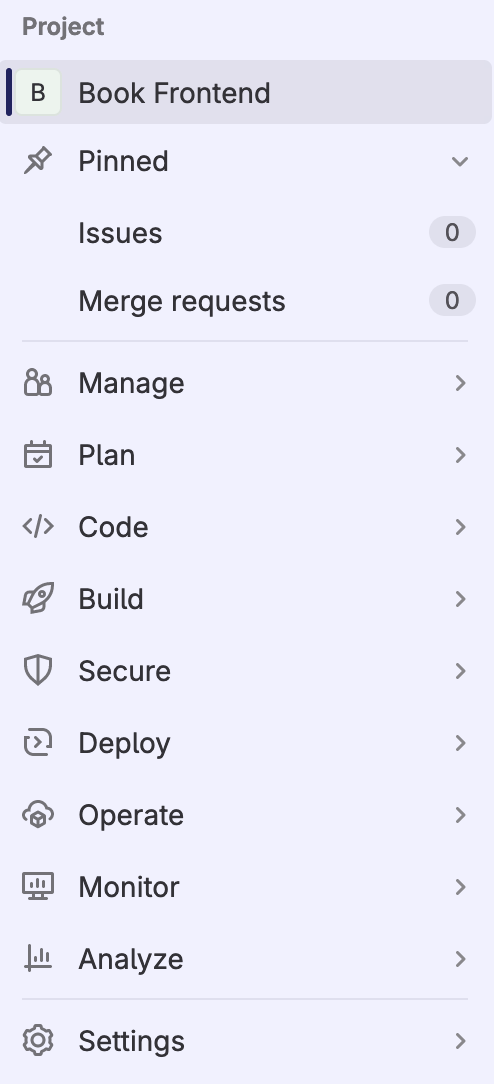
This menu is giving us access to all Gitlab features which are project related.
Pinned
We have a Pinned section which is configurable and have shortcuts to the feature which normally are the most used. By default it is Issues and Merge requests.
Manage
We have Manage section where we have these features:
-
Activity
-
Members
-
Labels
Plan
We have Plan section where we have these features:
-
Issues
-
Issue boards
-
Milestones
-
Wiki
Code
We have Code section where we have these features:
-
Merge requests
-
Repository
-
Branches
-
Commits
-
Tags
-
Repository graph
-
Compare revisions
-
Snippets
Build
We have Build section which looks like this:
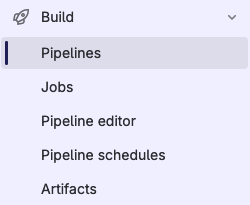
and as you can see have these features:
-
Pipelines
-
Jobs
-
Pipeline editor
-
Pipeline schedules
-
Artifacts
Because we will be strongly focusing on this section during this workshops let’s focus a little on it.
- Pipelines
-
We have here a list of our pipelines which are connected to this project. We can easily jom from it to the particular pipeline and job connected to the pipeline
- Jobs
-
This is a list of jobs which were: passed, manual (waiting for run action), running, pending, and failed. This view is only useful if you do not know why your pipeline is still waiting for something or just investigate by job.
- Pipeline editor
-
You can use build in pipeline editor which will help you with creating your pipeline. Because Gitlab pipelines are created with a use of the YAML files it is not required to use it but it’s features can help you with more complex pipelines like we will see during this workshop.
- Pipeline schedules
-
Where we can schedule our periodic pipeline.
- Artifacts
-
Where we can easily browse artifacts created by our pipelines.
Secure
We have Secure section where we have these features:
-
Security capabilities
-
Audit events
-
Security configuration
Those features are available mostly in the paid plans of the Gitlab system.
Deploy
We have Deploy section which looks like this:
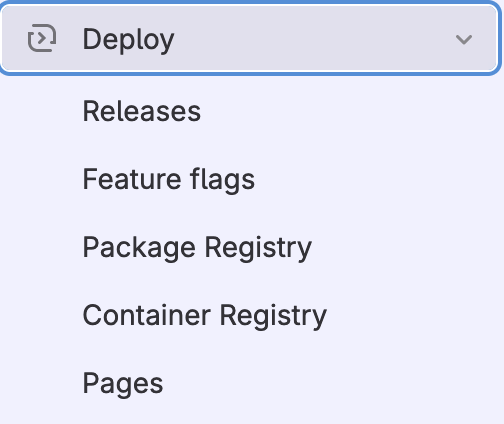
and as you can see have these features:
-
Releases
-
Feature flags
-
Package Registry
-
Container Registry
-
Pages
We will be focusing on this section later as some of those features we are using in the our Continuous Delivery and Deployment process.
Operate
We have Operate section which looks like this:
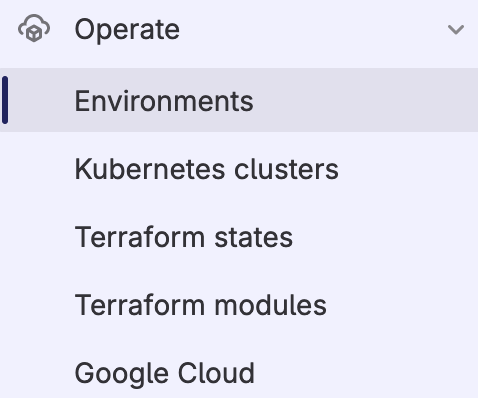
and as you can see have these features:
-
Environments
-
Kubernetes clusters
-
Terraform states
-
Terraform modules
-
Google Cloud
but we will only look at Environments feature during those workshop.
Monitor
We have Monitor section where we have these features:
-
Error tracking
-
Alerts
-
Incidents
-
Service Desk
Analyze
We have Analyze section where we have these features:
-
Value Stream Analytics
-
Contributor statistics
-
CI/CD Analytics
-
Repository Analytics
-
Model experiments
Settings
We have Settings section which looks like this:
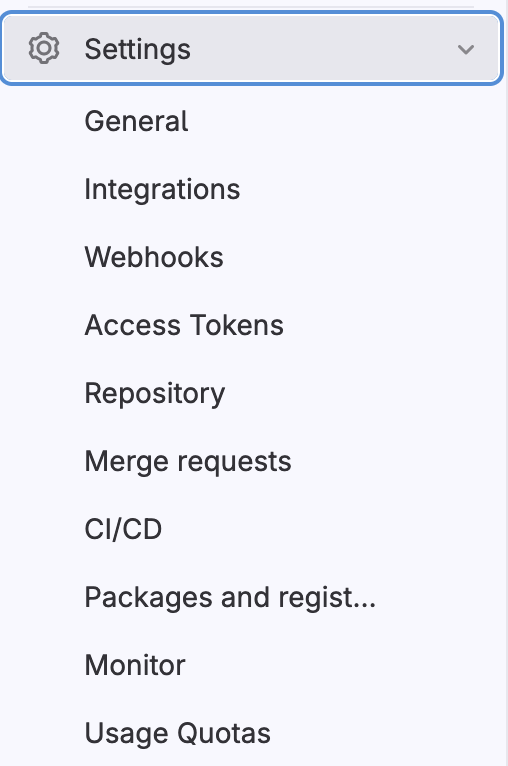
and as you can see have these features:
-
General
-
Integrations
-
Webhooks
-
Access Tokens
-
Repository
-
Merge requests
-
Ci/CD
-
Packages and registries settings
-
Monitor
-
Usage Quotas
We will be only focusing on CI/CD configuration feature.
Frontend Service Pipeline Overview
Because we will be focusing on Book Frontend service we will focus on this service pipeline.
To work with pipelines in the Gitlab we first need to open a Build section and then choose a Pipelines option.
In our example link to this option will be: Book Frontend - Pipelines
And we will see our pipelines with a short text and graphical description.
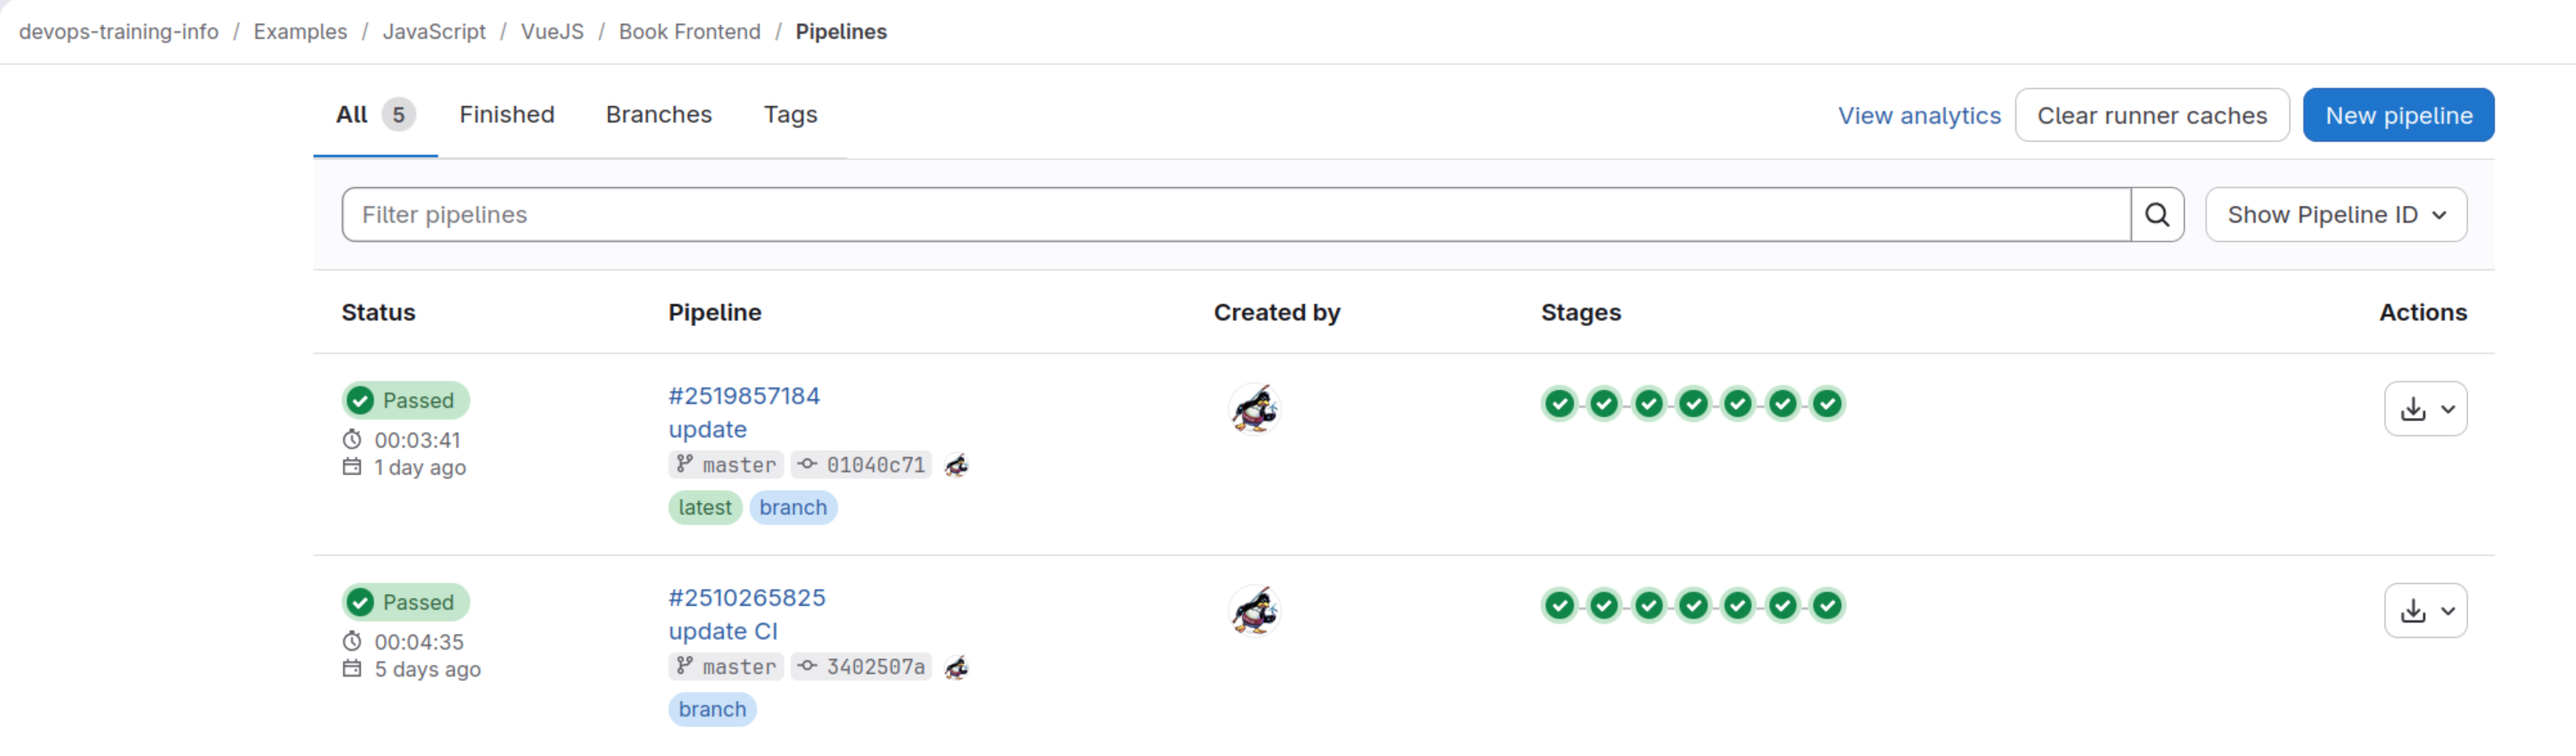
In the upper case we can see that all our stages of the visible pipelines are green and those pipelines passed.
In this page we can also Run pipeline manually and do many various actions we normally need like by example retrying our pipelines and of course check details of them.
Let’s do a fast look on one of those pipelines:
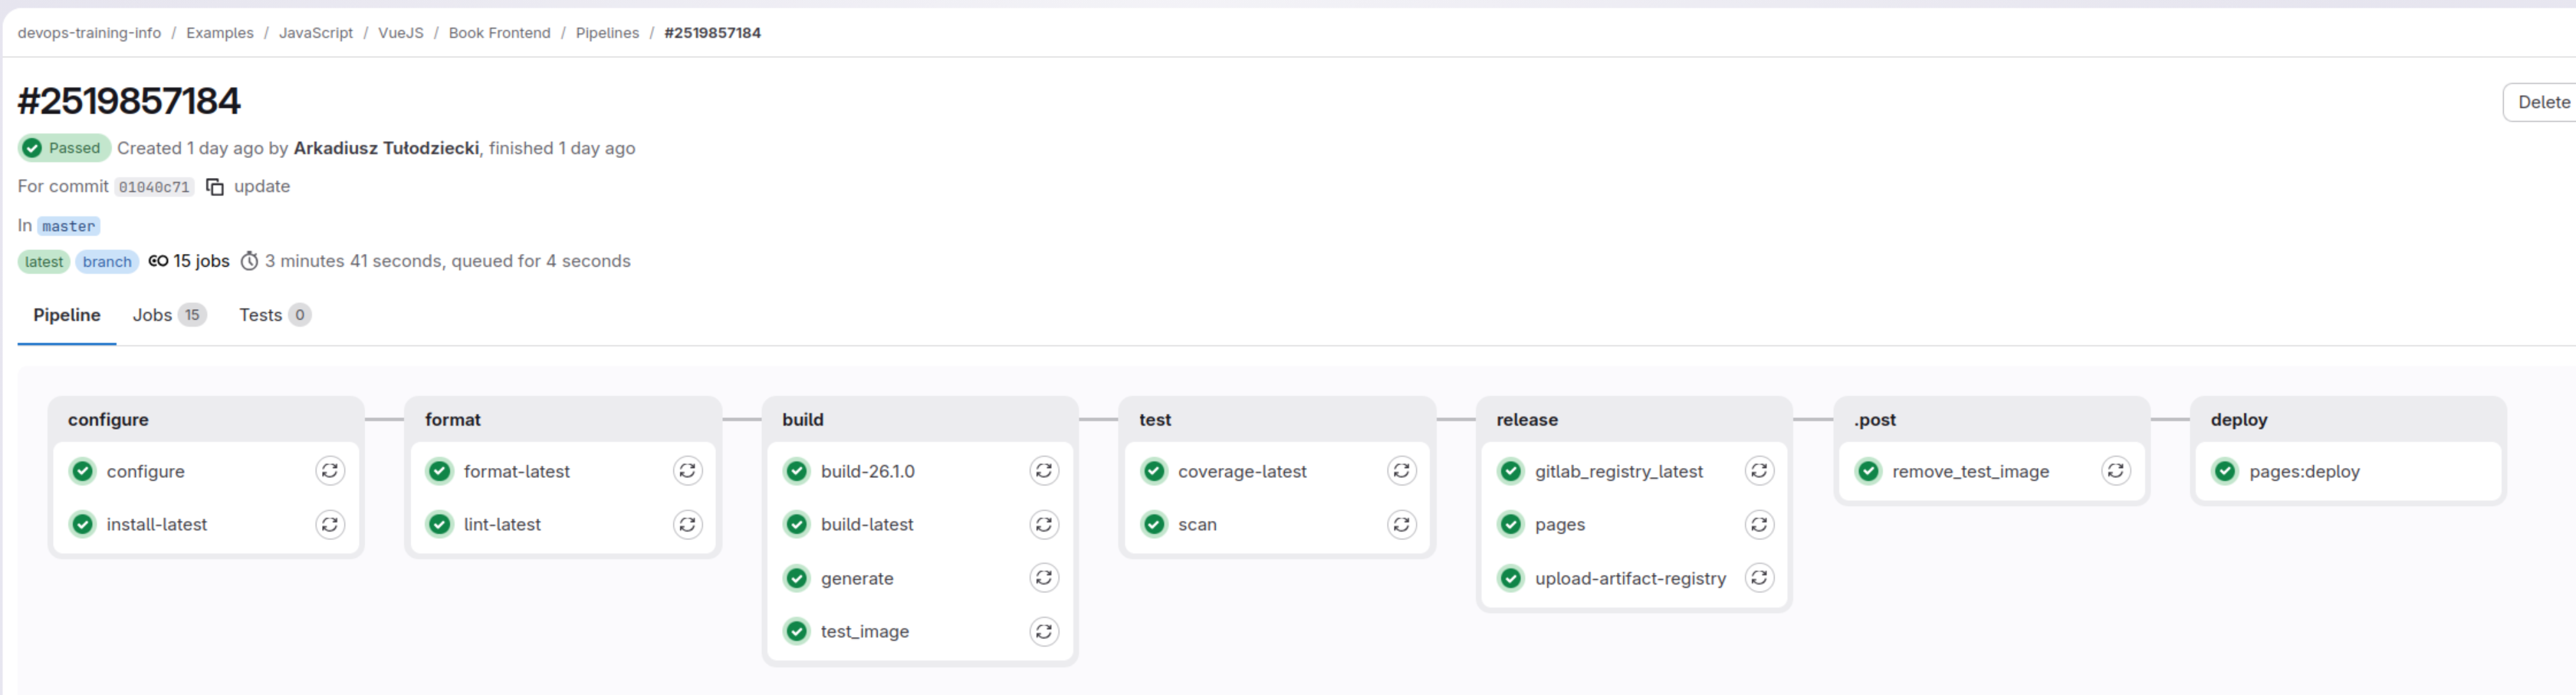
In our example link to this pipeline will be: Book Frontend - Pipeline
In this view we can see stages our pipeline have and all jobs which are a part of these stages.
In our case those stages are:
-
configure
-
pre-build-tests
-
build
-
post-build-tests
-
release
-
deploy
-
.post
Lets focus a little on them now.
Configure
Let us focus first on the configure stage visible below:
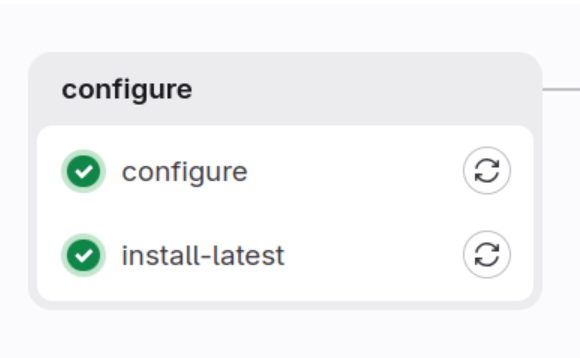
In this stage we have fwo jobs:
-
First one is also called configure in our case we are generating configuration for the CI and also for the deployment to the staging and production environments which are Kubernetes based.
-
Second section will download all required packages as we will be reusing them in the other jobs.
Pre Build Tests
In our example we have linters. We are using them to check if code is written properly.
Let us look on the format stage now:
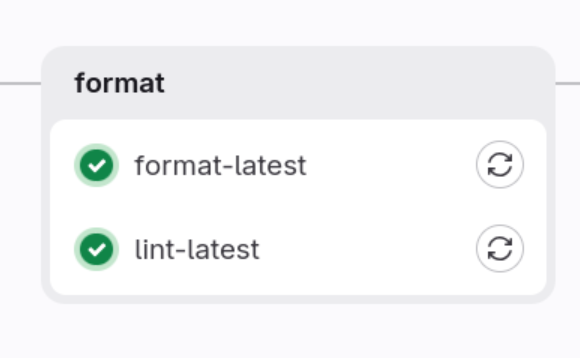
In this stage we are focusing on the two:
-
code format with Prettier
-
static analysis with ESLint
Those tests are normally very fast and can fail before we even think about build our application which will save our time.
Build
Let look how this stage look as it is a little unusual:
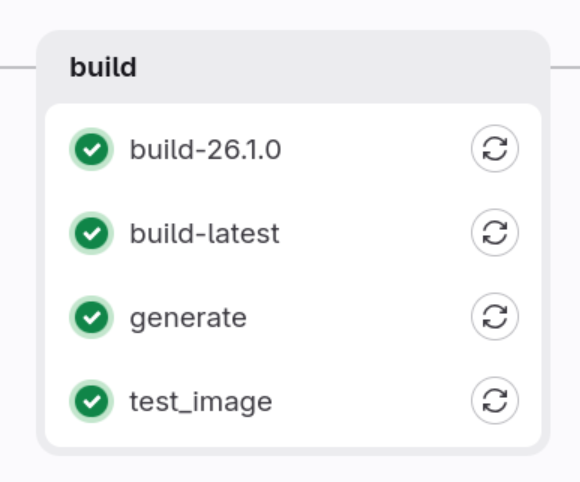
We have three jobs here
-
build for node 26.1.0
-
build for latest node
-
generate
-
test_image
First, and second one is an example which shows how to just build projects which will give us artifacts with a result of the build for a various versions of node with them we can check if our app can be built for a different versions of Node.js.
Third one is building project documentation for a developers.
Forth one is building test docker image which we will be using later. Instead of the standard artifacts in this example we have a docker image which is stored in the Gitlab docker registry.
Post Build Tests
Let us look on the post-build tests stage now:
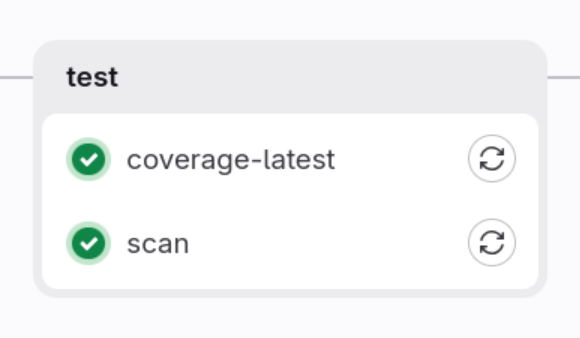
We have two jobs here:
-
coverage-latest
-
scan
First job is running standard testing and will generate coverage report for us.
Second job will do a security scan of the test docker image.
Release
This stage is a part of the Continuous Delivery process
Let us do a first look at it:
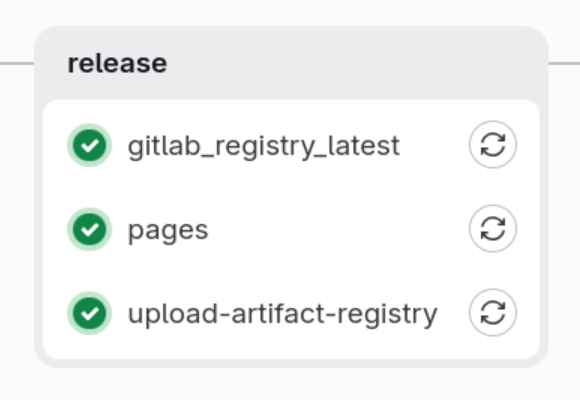
We have three jobs here
-
gitlab_registry_latest
-
pages
-
upload-artifact-registry
This stage is assuming that all our tests passed, and now we are preparing rest of the artifacts required for the deployment to our Kubernetes or Container based environments.
First one is preparing our image to be used by us in the local development process by copying/creating[3] our docker image to the Gitlab Registry.
Second one will start release process of our build documentation to the Gitlab Pages service.
Third one is preparing our image to be used in the Google Kubernetes engine or Google Cloud Run by copying/creating[4] our docker image to the Google Artifact Registry service.
Deploy
This stage is a part of the Continuous Deployment process
| Currently, we do not have new version of the GKE or Cloud Run prepared and we will show only pages deployment part. I hope this will be fixed soon |
Let us do a first look at it:
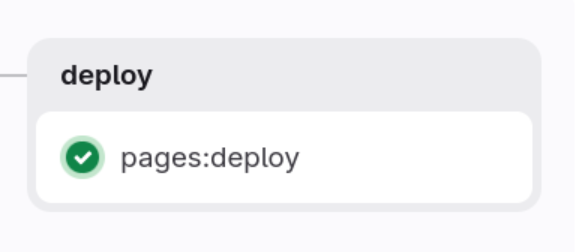
We have one job here
-
pages:deploy
First one is scheduled and ran automatically by Gitlab CI as the release job pages is scheduling it. This one when will end will create/update documentation using Gitlab Pages service. This documentation for the Book Frontend service will be available here: Book Frontend documentation.
Post
This stage is a special stage which will start when pipeline ends
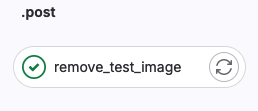
In case of our frontend application we have one job here
-
remove_test_image
This job is started when pipeline will end and do not matter id pipeline will end with success or not. This job will try to remove test image and will end with success if test image was existing and remove will end with success or will end with warning if test image was not existing or was not possible to remove.
Backend Services Pipelines Overview
All our Backends are using the same template for the pipeline because are written in the same language and are using the same framework.
This pipeline looks like this:

As you can see this pipeline looks very similar to the pipeline we are using for our frontend service.
The same as for the frontend service we have sections with the same names an many jobs look exactly the same. We will see soon why when we will focus on the concept of the shared templates and jobs.
Gitlab Container Registry
We will be using Gitlab Container Registry feature to store our docker images.
Each of our example projects will be deployed to the Kubernetes cluster, or Container based environment - and also used locally by us, and our team members.
For example, you can check images created by Book Frontend CI located in this project Container Registry which is located in the Deploy menu section.
You will see that in our case we have two subsections there:
- book-frontend where we have our standard images and for example our latest image registry.gitlab.com/mobica-workshops/examples/js/vuejs/book-frontend:latest
- book-frontend/test where we have test images. This one should be empty when all pipelines ends as those images are deleted in the post action you saw in the previous section.
Gitlab Pages
We will be using Gitlab Pages feature to deploy our project technical documentation.
Each of our example projects have technical documentation created with a use of SSG (Static Site Generator) software. We are using asciidoctor in our projects byt there are better ones to do this like for example Hugo[5] which is used by example to create Kubernetes documentation.
For example, you can check link to the Documentation we are creating using our pipeline for the Book Frontend service in the Pages subsection in the Deploy section.
In our case documentation link looks like this: https://book-frontend-11cecb.gitlab.io. GitLab allows you to configure domain for this page.
Gitlab CI
Before we start our first hand ons let’s talk a little about Gitlab CI.
Gitlab CI is fully integrated with the Gitlab system, the same as other gitlab features. Like was mentioned only external part of the Gitlab CI are Gitlab Runners. In the Requirements section you will find how to create own runners.
To start using GitLab CI/CD in your project you will need to create a .gitlab-ci.yml file at the root of your project. This file follows the YAML format and has its own special syntax which can be found here. We will use a lot of features mentioned there but of course not all.
Gitlab CI can be used for a projects which have multiple repositories multi-repo but also for the monorepo type of projects. We will focus on multi-repo during this workshop.
Gitlab CI have also own subsection in the Settings section.
It is possible to configure runners per server, group and project.
Official Gitlab Trainings
Your first pipeline
A First pipeline tutorial is available here:
If you will any questions please contact Me. This tutorial should take not more than between 5 and 10 min of your time.
Explanation
Please read tips section of the official tutorial first. Most of my explanations here will be just a duplicate.
 1
 2
 3
 4
 5
 6
 7
 8
 9
10
11
12
13
14
15
16
17
18
19
20
21
22
23
build-job: (1)
  stage: build (2)
  script: (3)
    - echo "Hello, $GITLAB_USER_LOGIN!"

test-job1:
  stage: test
  script:
    - echo "This job tests something"

test-job2:
  stage: test
  script:
    - echo "This job tests something, but takes more time than test-job1."
    - echo "After the echo commands complete, it runs the sleep command for 20 seconds"
    - echo "which simulates a test that runs 20 seconds longer than test-job1"
    - sleep 20

deploy-prod:
  stage: deploy
  script:
    - echo "This job deploys something from the $CI_COMMIT_BRANCH branch."
  environment: production (4)
| 1 | Name of the job will be build-job |
| 2 | We can group our jobs in stages. Jobs in the same stage normally are ran in parallel. There can be other configuration in the Gitlab CI file or on runner which will not made this possible. |
| 3 | Script section is a place where we are executing our commands on the runner. Folder we are in is a root folder of our repository. |
| 4 | We can inform gitlab which environment was used for a deployment. |
This super easy example shows a core of the Gitlab CI system. You will be extending this more and more depends on your needs, and we will show you during those workshops a preview of how much elastic this system is.
A complex pipeline
Before you start working on this tutorial I advise you to add .gitignore file which is not mentioned, and ignore at least node_modules/ folder before adding anything to the git repository.
|
Now, please do a next a little more complex training which is available on the official Gitlab page here:
If you will any questions please contact Me. This tutorial should take not more than between 10 and 20 min of your time.
Explanation
This pipeline is really nicely explain during the tutorial.
Let’s just focus on what this tutorials show.
Because this example is using deployment of a documentation to the Gitlab Pages service we can see a complete pipeline which have here 3 stages:
-
Build stage where we are building our documentation and creating artifacts which will be used for a deployment.
-
Test stage were we are testing our code.
-
Deploy stage which is deploying our documentation to the Gitlab Pages service.
DevOps pipeline for our microservices
Frontend microservice Gitlab CI pipeline
TODO: Video with demo
Now Let’s start with the .gitlab-ci.yml file which we have in the Book Frontend repository
 1
 2
 3
 4
 5
 6
 7
 8
 9
10
11
12
13
14
15
16
17
18
19
20
21
22
23
24
25
26
27
28
29
30
31
32
33
34
35
36
37
38
39
40
41
42
43
44
45
46
47
48
49
50
51
52
53
# Version: 6.0
variables: (1)
  FF_NETWORK_PER_BUILD: "true"
  APP_NAME: book-frontend (2)

stages: (3)
  - configure
  - format
  - build
  - test
  - security
  - release

include: (4)
  - component: gitlab.com/devops-training-info/templates/ci/components/ansible-component/configure@1.0.0
    inputs:
      stage: configure
  - component: gitlab.com/devops-training-info/templates/ci/components/js-component/install@1.1.0
    inputs:
      stage: configure
  - component: gitlab.com/devops-training-info/templates/ci/components/js-component/format@1.1.0
    inputs:
      stage: format
  - component: gitlab.com/devops-training-info/templates/ci/components/js-component/lint@1.1.0
    inputs:
      stage: format
  - component: gitlab.com/devops-training-info/templates/ci/components/js-component/build@1.1.0
    inputs:
      stage: build
  - component: gitlab.com/devops-training-info/templates/ci/components/js-component/build@1.1.0
    inputs:
      stage: build
      node_version: "26.1.0"
  - component:  gitlab.com/devops-training-info/templates/ci/components/asciidoctor-component/generate@1.0.0
    inputs:
      stage: build
      ruby_image: ruby:3.4
  - component: gitlab.com/devops-training-info/templates/ci/components/container-component/build@1.0.2
    inputs:
      stage: build
  - component: gitlab.com/devops-training-info/templates/ci/components/js-component/coverage@1.1.0
    inputs:
      stage: test
  - component: gitlab.com/devops-training-info/templates/ci/components/security-component/trivy@1.0.0
    inputs:
      stage: test
  - component: gitlab.com/devops-training-info/templates/ci/components/asciidoctor-component/pages@1.0.0
    inputs:
      stage: release
  - component: gitlab.com/devops-training-info/templates/ci/components/container-component/release@1.0.2
    inputs:
      stage: release
  - component: gitlab.com/devops-training-info/templates/ci/components/container-component/clean@1.0.2
| 1 | environment variable which can be used in the pipeline jobs |
| 2 | this variable will be used by one of our components and shows that we still have a lot to do as we should give it as an input later on |
| 3 | pipeline stages which will exists in our pipeline and cut it into stages |
| 4 | we can include in our YAML files - you can find a lot of examples here: https://docs.gitlab.com/ci/yaml/includes/. We plan to use this feature for a Component based flow - you can read more about it here: https://docs.gitlab.com/ci/components/. We will be focusing a lot on this flow during this workshop. |
Component based flow we will be using in our workshop uses special component projects stored in the separate repositories. Those component projects should be created in a way which will use CI for testing them. Our examples are using this testing and have own CI pipelines. This flow also allows easy to understand way to version components we are using to mitigate issue when older version of the application no longer have working CI.
Configure stage
In this stage we are including two component templates:
1
2
3
4
5
6
7
8
9
# ...
include:
  - component: gitlab.com/devops-training-info/templates/ci/components/ansible-component/configure@1.0.0 (1)
    inputs: (2)
      stage: configure (3)
  - component: gitlab.com/devops-training-info/templates/ci/components/js-component/install@1.1.0
    inputs:
      stage: configure
# ...
| 1 | We are giving a path to the template in a format which this GitLab feature expects. In this example this is component project: gitlab.com/devops-training-info/templates/ci/components/ansible-component, template: configure and tag: 1.0.0 |
| 2 | We are setting also inputs which will be used by this template |
| 3 | Input we are giving is stage and value we are giving is configure |
Let' start with a first component template available here: https://gitlab.com/devops-training-info/templates/ci/components/ansible-component/-/blob/master/templates/configure.yml?ref_type=heads
 1
 2
 3
 4
 5
 6
 7
 8
 9
10
11
12
13
14
15
16
17
18
19
20
21
22
23
24
25
26
27
28
spec: (1)
  inputs:
    stage: (2)
      default: configure
      description: "Defines the build stage"
    ansible_image:
      default: alpine/ansible
      description: "Defines image with ansible to use"
    shell_script:
      default: "./scripts/gitlab-configure.sh"
      description: "Defines location of prepared shell script which should configure and run ansible playbook"
    ansible_artifacts_paths:
      type: array
      default:
        - secrets
      description: "Defines locations of generated artifacts"
---

configure: (3)
  image: $[[ inputs.ansible_image ]]
  stage: $[[ inputs.stage ]]
  before_script:
    - ansible --version
  script:
    - $[[ inputs.shell_script ]] (4)
  artifacts:
    expire_in: 1 week
    paths: $[[ inputs.ansible_artifacts_paths ]] (5)
| 1 | This is a spec configuration which in our case are inputs. |
| 2 | We are using this input in our example just to show how to use it. Our example uses exactly the same value as is a default value here. |
| 3 | This is a job which this template will give us and will be run in our example. |
| 4 | We are also using a shell script which is stored with a repository and is maintained by a team working on the project pipeline currently working at - with this template we can give its name with using input shell_script. |
| 5 | In our case we are generating configuration files in the secrets folder. We are storing this as artifacts in the repository. Normally you will not have staging and production secrets store this way but for simplicity we are also storing secrets in those files. |
This Component is tested, and you can see it here: https://gitlab.com/devops-training-info/templates/ci/components/ansible-component/-/pipelines
CI file here: https://gitlab.com/devops-training-info/templates/ci/components/ansible-component/-/blob/master/.gitlab-ci.yml?ref_type=heads Which looks like this:
1
2
3
4
5
6
7
8
stages:
  - configure

include:
  - component: $CI_SERVER_FQDN/$CI_PROJECT_PATH/configure@$CI_COMMIT_SHA (1)
    inputs:
      stage: configure
      ansible_image: alpine/ansible
| 1 | each commit of this template is tested |
No lets look at the second component template available here: https://gitlab.com/devops-training-info/templates/ci/components/js-component/-/blob/master/templates/install.yml?ref_type=heads
 1
 2
 3
 4
 5
 6
 7
 8
 9
10
11
12
13
14
15
16
17
18
spec:
  inputs:
    stage:
      default: 'configure'
      description: 'Defines the format stage'
    node_version:
      default: 'latest'
      description: 'Node image version tag'
---
"install-$[[ inputs.node_version ]]": (1)
  image: registry.gitlab.com/devops-training-info/examples/docker/node-yarn:$[[ inputs.node_version ]] (2)
  stage: $[[ inputs.stage ]]
  script:
    - yarn install (3)
  artifacts: (4)
    expire_in: 1 week
    paths:
      - node_modules
| 1 | Name of the job can be modified with a input. With this we can for example have a different job name for a different node version. |
| 2 | Unfortunately yarn is no longer added by default to the node image that is why we are currently using our own modified node image https://gitlab.com/devops-training-info/examples/docker/node-yarn/-/blob/master/Dockerfile?ref_type=heads. Because now we have classic yarn and modern yarn - most probably I should just migrate from yarn to the standard node with my examples ;). |
| 3 | We will install all dependencies |
| 4 | We will store installed dependencies as artifacts for 1 week and use them in all other jobs which will depend on this one. |
Format stage
In this stage we are including two component templates:
# ...
include:
  # ...
  - component: gitlab.com/devops-training-info/templates/ci/components/js-component/format@1.1.0
    inputs:
      stage: format
  - component: gitlab.com/devops-training-info/templates/ci/components/js-component/lint@1.1.0
    inputs:
      stage: format
# ...
As you can see one component can have many templates.
First template looks like this:
spec:
  inputs:
    stage:
      default: 'pre-build-tests'
      description: 'Defines the format stage'
    node_version:
      default: 'latest'
      description: 'Node image version tag'
---
"format-$[[ inputs.node_version ]]":
  image: registry.gitlab.com/devops-training-info/examples/docker/node-yarn:$[[ inputs.node_version ]]
  stage: $[[ inputs.stage ]]
  script:
    - yarn test:format
Second template looks like this:
spec:
  inputs:
    stage:
      default: 'pre-build-tests'
      description: 'Defines the format stage'
    node_version:
      default: 'latest'
      description: 'Node image version tag'
---
"lint-$[[ inputs.node_version ]]":
  image: registry.gitlab.com/devops-training-info/examples/docker/node-yarn:$[[ inputs.node_version ]]
  stage: $[[ inputs.stage ]]
  script:
    - yarn test:lint
This stage is focusing on code quality
Build stage
In this stage we are including four component templates:
# ...
include:
  # ...
  - component: gitlab.com/devops-training-info/templates/ci/components/js-component/build@1.1.0
    inputs:
      stage: build
  - component: gitlab.com/devops-training-info/templates/ci/components/js-component/build@1.1.0
    inputs:
      stage: build
      node_version: "26.1.0"
  - component:  gitlab.com/devops-training-info/templates/ci/components/asciidoctor-component/generate@1.0.0
    inputs:
      stage: build
      ruby_image: ruby:3.4
  - component: gitlab.com/devops-training-info/templates/ci/components/container-component/build@1.0.2
    inputs:
      stage: build
# ...
In this stage we are introducing two new components. One is an asciidoctor component and second one is a container component.
This time just let’s focus only on the container component as the other three are not giving us anything new.
We are using build template of this component which looks like this:
 1
 2
 3
 4
 5
 6
 7
 8
 9
10
11
12
13
14
15
16
17
18
19
20
21
22
23
24
25
26
27
28
spec:
  inputs:
    stage:
      default: 'build'
      description: 'Defines the build stage'
    docker_file:
      default: 'multi-stage.Dockerfile'
      description: 'Name of the Dockerfile to use for Container creation'
    test_image:
      default: ${CI_REGISTRY_IMAGE}/test:${CI_COMMIT_SHA}_${CI_PIPELINE_ID} (1)
      description: 'Name of the target container test image'
---

test_image:
  stage: $[[ inputs.stage ]]
  variables:
    DOCKER_FILE: $[[ inputs.docker_file ]]
    CONTAINER_TEST_IMAGE: $[[ inputs.test_image ]]
  image:
    name: gcr.io/kaniko-project/executor:debug
    entrypoint: [""]
  script:
    - mkdir -p /kaniko/.docker
    - echo "{\"auths\":{\"${CI_REGISTRY}\":{\"auth\":\"$(printf "%s:%s" "${CI_REGISTRY_USER}" "${CI_REGISTRY_PASSWORD}" | base64 | tr -d '\n')\"}}}" > /kaniko/.docker/config.json
    - /kaniko/executor --context "${CI_PROJECT_DIR}" --dockerfile "${CI_PROJECT_DIR}/${DOCKER_FILE}" --destination "${CONTAINER_TEST_IMAGE}"
  after_script: (2)
    # If we try to pull the image immediately it sometimes fails
    - /bin/sleep 5
| 1 | In the spec inputs default values we can use Gitlab variables as is visible here |
| 2 | We are using here after_script to give some time to the pipeline to be really finished as the last part of the storing container in the Gitlab Registry is async. |
Test stage
In this stage we are including two component templates:
# ...
include:
  # ...
  - component: gitlab.com/devops-training-info/templates/ci/components/js-component/coverage@1.1.0
    inputs:
      stage: test
  - component: gitlab.com/devops-training-info/templates/ci/components/security-component/trivy@1.0.0
    inputs:
      stage: test
# ...
Let’s check our coverage template:
 1
 2
 3
 4
 5
 6
 7
 8
 9
10
11
12
13
14
15
16
17
18
19
spec:
  inputs:
    stage:
      default: 'pre-build-tests'
      description: 'Defines the format stage'
    node_version:
      default: 'latest'
      description: 'Node image version tag'
---
"coverage-$[[ inputs.node_version ]]":
  image: registry.gitlab.com/devops-training-info/examples/docker/node-yarn:$[[ inputs.node_version ]]
  stage: $[[ inputs.stage ]]
  script:
    - yarn test:coverage
  artifacts:
    reports: (1)
      coverage_report:
        coverage_format: cobertura
        path: coverage/cobertura-coverage.xml
| 1 | This one will end with generating coverage report. In gitlab there is visualization of those reports which is better in the paid plans but also exists in the free plan. For the free plan we need to use coverage in the cobertura format. |
Now there is also something interesting in the trivy template:
 1
 2
 3
 4
 5
 6
 7
 8
 9
10
11
12
13
14
15
16
17
18
19
20
21
22
23
24
25
26
27
28
29
30
31
32
33
34
35
36
37
38
39
40
41
42
43
44
45
46
47
spec:
  inputs:
    stage:
      default: test
      description: "Defines the build stage"
    image_to_scan:
      default: "${CI_REGISTRY_IMAGE}/test:${CI_COMMIT_SHA}_${CI_PIPELINE_ID}"
      description: "Image which we are planning to scan for security"
---

scan:
  stage: $[[ inputs.stage ]]
  image:
    name: docker.io/aquasec/trivy:latest
    entrypoint: [ "" ]
  variables:
    # No need to clone the repo, we exclusively work on artifacts.  See
    # https://docs.gitlab.com/ee/ci/runners/README.html#git-strategy
    GIT_STRATEGY: none
    TRIVY_USERNAME: "$CI_REGISTRY_USER"
    TRIVY_PASSWORD: "$CI_REGISTRY_PASSWORD"
    TRIVY_AUTH_URL: "$CI_REGISTRY"
    TRIVY_DB_REPOSITORY: "public.ecr.aws/aquasecurity/trivy-db"
    TRIVY_JAVA_DB_REPOSITORY: "public.ecr.aws/aquasecurity/trivy-java-db"
    CONTAINER_TEST_IMAGE: $[[ inputs.image_to_scan ]]
  script:
    - trivy --version
    # cache cleanup is needed when scanning images with the same tags, it does not remove the database
    - time trivy clean --scan-cache
    # update vulnerabilities db
    - time trivy image --download-db-only --no-progress --cache-dir .trivycache/
    # Builds report and puts it in the default workdir $CI_PROJECT_DIR, so `artifacts:` can take it from there
    - time trivy image --exit-code 0 --cache-dir .trivycache/ --no-progress --format template --template "@/contrib/gitlab.tpl"
        --output "$CI_PROJECT_DIR/gl-container-scanning-report.json" "$CONTAINER_TEST_IMAGE"
    # Prints full report
    - time trivy image --exit-code 0 --cache-dir .trivycache/ --severity CRITICAL,HIGH,MEDIUM --ignore-unfixed --no-progress "$CONTAINER_TEST_IMAGE"
    # Fail on critical vulnerabilities which are fixed
    - time trivy image --exit-code 1 --cache-dir .trivycache/ --severity CRITICAL --ignore-unfixed --no-progress "$CONTAINER_TEST_IMAGE"
  allow_failure: true (1)
  cache:
    paths:
      - .trivycache/
  # Enables https://docs.gitlab.com/ee/user/application_security/container_scanning/ (Container Scanning report is available on GitLab EE Ultimate or GitLab.com Gold)
  artifacts: (2)
    when:                          always
    reports:
      container_scanning:          gl-container-scanning-report.json
| 1 | we are allowing this one to fail because there is high risk of false positive result, and also someone needs to decide what is better at the moment - older version with more security issues or newer version with less. |
| 2 | unfortunately this report we are saving as artifact is only available in the paid plan. |
Release stage
In this stage we are including three component templates:
# ...
include:
  # ...
  - component: gitlab.com/devops-training-info/templates/ci/components/asciidoctor-component/pages@1.0.0
    inputs:
      stage: release
  - component: gitlab.com/devops-training-info/templates/ci/components/container-component/release@1.0.2
    inputs:
      stage: release
  - component: gitlab.com/devops-training-info/templates/ci/components/container-component/clean@1.0.2
# ...
First let’s look at the pages template:
 1
 2
 3
 4
 5
 6
 7
 8
 9
10
11
12
13
14
15
16
17
18
19
20
21
22
23
spec:
  inputs:
    stage:
      default: release
      description: "Defines the build stage"
---

pages: (1)
  stage: $[[ inputs.stage ]]
  image: alpine:latest
  script: (2)
    - mkdir -p public
    - mkdir -p doc/images
    - cp -R doc/images public/
    - cp doc/$APP_NAME.html public/index.html
    - cp doc/$APP_NAME.pdf public/
  artifacts: (3)
    paths:
      - public
  only:
    - master
  dependencies:
    - generate
| 1 | In case of Gitlab Pages we just need a job named pages, and we need to prepare artifacts in a way explained in the Gitlab Pages documentation. |
| 2 | asciidoctor will generate our documentation in the doc folder. We are storing files important to the Gitlab pages as the artifacts. |
| 3 | We must set this public folder as artifact to make possible Gitlab Pages service to copy it to the valid place. |
Next let’s check our release template:
 1
 2
 3
 4
 5
 6
 7
 8
 9
10
11
12
13
14
15
16
17
18
19
20
21
22
23
24
25
26
27
28
29
30
31
32
33
34
35
36
37
38
39
40
41
42
43
44
45
46
47
48
49
50
51
52
53
54
55
56
57
58
59
60
61
62
63
64
65
66
67
68
69
70
71
72
73
74
75
76
77
78
79
80
81
82
83
84
spec:
  inputs:
    stage:
      default: 'release'
      description: 'Defines the build stage'
    docker_file:
      default: 'multi-stage.Dockerfile'
      description: 'Name of the Dockerfile to use for Container creation'
    source_image:
      default: ${CI_REGISTRY_IMAGE}/test:${CI_COMMIT_SHA}_${CI_PIPELINE_ID}
      description: 'Name of the target container test image'
---

# final image for the feature branch -
gitlab_registry_branch:
  stage: $[[ inputs.stage ]]
  variables:
    DOCKER_FILE: $[[ inputs.docker_file ]]
    CONTAINER_IMAGE: $CI_REGISTRY_IMAGE:$CI_COMMIT_REF_SLUG (1)
  image:
    name: gcr.io/kaniko-project/executor:debug
    entrypoint: [""]
  script:
    - mkdir -p /kaniko/.docker
    - echo "{\"auths\":{\"${CI_REGISTRY}\":{\"auth\":\"$(printf "%s:%s" "${CI_REGISTRY_USER}" "${CI_REGISTRY_PASSWORD}" | base64 | tr -d '\n')\"}}}" > /kaniko/.docker/config.json
    - /kaniko/executor --context "${CI_PROJECT_DIR}" --dockerfile "${CI_PROJECT_DIR}/${DOCKER_FILE}" --destination "${CONTAINER_IMAGE}"
  except: (2)
    - master
    - tags
  when: manual

# final image for the master branch
gitlab_registry_latest:
  stage: $[[ inputs.stage ]]
  image:
    name: gcr.io/go-containerregistry/crane:debug
    entrypoint: [""]
  variables:
    GIT_STRATEGY: none
    CONTAINER_SOURCE_IMAGE: $[[ inputs.source_image ]]
    CONTAINER_TARGET_IMAGE: $CI_REGISTRY_IMAGE:latest
  before_script:
    - crane auth login -u gitlab-ci-token -p $CI_JOB_TOKEN $CI_REGISTRY
  script:
    - crane cp $CONTAINER_SOURCE_IMAGE $CONTAINER_TARGET_IMAGE
  dependencies:
    - test_image
  only:
    - master

# final image for the production ready deployment - tags
gitlab_registry_tag:
  stage: $[[ inputs.stage ]]
  image:
    name: gcr.io/go-containerregistry/crane:debug
    entrypoint: [""]
  variables:
    GIT_STRATEGY: none
    CONTAINER_SOURCE_IMAGE: $[[ inputs.source_image ]]
    CONTAINER_TARGET_IMAGE: $CI_REGISTRY_IMAGE:$CI_COMMIT_REF_NAME
  before_script:
    - crane auth login -u gitlab-ci-token -p $CI_JOB_TOKEN $CI_REGISTRY
  script:
    - crane cp $CONTAINER_SOURCE_IMAGE $CONTAINER_TARGET_IMAGE
  dependencies:
    - test_image
  only:
    - tags

include: (3)
  - component: gitlab.com/google-gitlab-components/artifact-registry/upload-artifact-registry@0.1.0
    inputs:
      stage: $[[ inputs.stage ]]
      source: ${CI_REGISTRY_IMAGE}/test:${CI_COMMIT_SHA}_${CI_PIPELINE_ID}
      target: europe-central2-docker.pkg.dev/devops-training-workshop-sbx/docker/$CI_PROJECT_PATH:latest
    only:
      - master
  - component: gitlab.com/google-gitlab-components/artifact-registry/upload-artifact-registry@0.1.0
    inputs:
      stage: $[[ inputs.stage ]]
      source: ${CI_REGISTRY_IMAGE}/test:${CI_COMMIT_SHA}_${CI_PIPELINE_ID}
      target: europe-central2-docker.pkg.dev/devops-training-workshop-sbx/docker/$CI_PROJECT_PATH:$CI_COMMIT_REF_NAME
    only:
      - tags
| 1 | We can use this job when we like to create normal (not test) image which tag will be by default a slug name of the branch (for tags and latest we are overwriting it). For example if a branch is called feature/user-api-change-1 our tag will be in the end: feature-user-api-change-1. It is important as docker tags have character restrictions. We also needs to be cautious as tags also have length limitations. |
| 2 | We are informing pipeline that this jobs can be used only when we are NOT at the master branch, and we are NOT tagging. |
| 3 | We can also include other component template - in our case we are using already prepared component for uploading to the Google Artifact Registry. |
Backend microservice Gitlab CI pipeline
TODO: Video with demo
Now Let’s start with the .gitlab-ci.yml file which we have in the Book List repository
 1
 2
 3
 4
 5
 6
 7
 8
 9
10
11
12
13
14
15
16
17
18
19
20
21
22
23
24
25
26
27
28
29
30
31
32
33
34
35
36
37
38
39
40
41
42
43
44
45
46
47
48
49
50
51
52
53
54
55
56
57
58
59
60
61
62
63
64
65
66
67
68
69
70
71
72
73
# Version: 6.0
variables: (1)
  FF_NETWORK_PER_BUILD: "true"
  APP_NAME: book-list
  POSTGRES_PASSWORD: 2vQU45haQCnDS8sO
  POSTGRES_USER: book-list
  POSTGRES_DB: book-list

stages:
  - configure
  - format
  - build
  - test
  - security
  - release
  - deploy
  - destroy

include:
  - component: gitlab.com/devops-training-info/templates/ci/components/ansible-component/configure@1.0.0
    inputs:
      stage: configure
  - component: gitlab.com/devops-training-info/templates/ci/components/go-component/format@1.0.0
    inputs:
      stage: format
  - component: gitlab.com/devops-training-info/templates/ci/components/go-component/build@1.0.0
    inputs:
      stage: build
  - component: gitlab.com/devops-training-info/templates/ci/components/go-component/build@1.0.0
    inputs:
      stage: build
      golang_version: "1.24"
  - component:  gitlab.com/devops-training-info/templates/ci/components/asciidoctor-component/generate@1.0.0
    inputs:
      stage: build
      ruby_image: ruby:3.4
  - component: gitlab.com/devops-training-info/templates/ci/components/container-component/build@1.0.2
    inputs:
      stage: build
  - component: gitlab.com/devops-training-info/templates/ci/components/go-component/test@1.0.0 (2)
    inputs:
      stage: test
      services:
        - name: postgres:14-alpine
          alias: book-list-db
        - name: redis:7-alpine
          alias: redis
  - component: gitlab.com/devops-training-info/templates/ci/components/go-component/coverage@1.0.0
    inputs:
      stage: test
      services:
        - name: postgres:14-alpine
          alias: book-list-db
        - name: redis:7-alpine
          alias: redis
  - component: gitlab.com/devops-training-info/templates/ci/components/security-component/trivy@1.0.0
    inputs:
      stage: test
  - component: gitlab.com/devops-training-info/templates/ci/components/asciidoctor-component/pages@1.0.0
    inputs:
      stage: release
  - component: gitlab.com/devops-training-info/templates/ci/components/container-component/release@1.0.2
    inputs:
      stage: release
  - component: gitlab.com/devops-training-info/templates/ci/components/container-component/clean@1.0.2
  - component: gitlab.com/devops-training-info/templates/ci/components/terraform-component/deploy@1.0.4
    inputs:
      stage: deploy
      folder: terraform/environments/staging/europe-central2/run
  - component: gitlab.com/devops-training-info/templates/ci/components/terraform-component/destroy@1.0.4
    inputs:
      stage: destroy
      folder: terraform/environments/staging/europe-central2/run
| 1 | The same as in a case of our frontend CI we need to rethink our use of variables here |
| 2 | We will focus in a moment on this template as it is bringing something new for us |
Like mentioned upper let’s focus on our go component test template:
 1
 2
 3
 4
 5
 6
 7
 8
 9
10
11
12
13
14
15
16
17
18
19
20
21
spec:
  inputs:
    stage:
      default: 'test'
      description: 'Defines the format stage'
    golang_version:
      default: 'latest'
      description: 'Golang image version tag'
    services:
      type: array
      default: []
      description: "Defines services which needs to exists for testing"

---

"test-$[[ inputs.golang_version ]]":
  image: golang:$[[ inputs.golang_version ]]
  stage: $[[ inputs.stage ]]
  script:
    - ./scripts/ci-test.sh
  services: $[[ inputs.services ]] (1)
| 1 | Our unit tests requires additional services to work and we are giving this part to the template as an input. |
Summary
Just to do a Quick Summary of presented solution.
As you can see our pipelines can be created in a reusable way and be complex in the nature. Normally this kind of complex pipelines can be found only in the medium and big projects which have more than 10 or 50 microservices.
Basically more repositories you have then more urgent is to create templates like we have shown here.
Component use Training
If you are Python developer we have a good training for this available here: https://python-gitlab-ci-cd-development-guide-be8161.gitlab.io If you haven’t done it yet, do it now.
| We are planning to extend this section for a Go programmers and potentially other languages to give you a choice here. |
What Next
Learning paths
After this workshop you can to take those learning paths:
-
A Cloud Guru Containers and Kubernetes related trainings - where you can learn more about Docker, Kubernetes, and Helm
-
A Cloud Guru DevOps automation related trainings - where you can learn more about Configuration Management tools like by example Ansible and many type of Pipelines
Next workshops in the microservices series
Backend
For a Backend developers we have this workshop in the series:
-
Backend local development with Docker and K3s for project using microservices architecture
Current agenda for the third edition looks like this:
-
Start 10:00
-
Section 1:
-
Architecture
-
Automation
-
Configuration
-
Service Skeleton
-
Readiness Checklist
-
Documentation
-
Services
-
Mockups
-
-
Coffee break 11:00 - 11:15
-
Section 2:
-
Book List API (demo)
-
-
Coffee break 12:30 - 12:45
-
Section 3:
-
Book Admin API (practice)
-
-
Lunch 13:30 - 14:00
-
Section 4:
-
Backend For Frontend (demo + practice)
-
-
Coffee break 15:15 - 15:30
-
Section 5:
-
Cleanup
-
What’s Next
-
Q&A
-
-
Ends between 16:00 and 17:00 - depends on Q&A session
Frontend
For a Frontend developers we have this workshop in the series:
-
Frontend local development with Docker and K3s for project using microservices architecture
Current agenda for the first edition looks like this:
-
Start 10:00
-
Section 1:
-
Architecture
-
Automation
-
Configuration
-
Service Skeleton
-
Readiness Checklist
-
Documentation
-
Services
-
-
Coffee break 11:00 - 11:15
-
Section 2:
-
Book Frontend (demo + practice)
-
-
Coffee break 12:30 - 12:45
-
Section 3:
-
What’s Next
-
Cleanup
-
Q&A
-
-
Ends between 13:00 and 13:30 - depends on Q&A session
Infrastructure
For Cloud Infrastructure Engineers and SysOps:
-
Preparing and using Infrastructure required for the projects using microservices architecture with the help of the Kubernetes, Clouds, Ansible, and Terraform.
Like in the title we will be creating mainly Cloud Infrastructure with a help of Terraform and other mentioned tools. It is possible that also bare metal will be mentioned and example prepared.
Related Open Source project:
We have also a special OpenSource project MOB175:
-
Preparing examples used in the workshops series connected to the microservices architecture.
Anyone who is interested can join in a free time and people who are currently without project can let us know if wanted to join this project. Please contact me to gain more details.
Cleanup
TODO: new version based on Components flow
Let’s start with removing our deployment from the cluster. Please add new job called cleanup
cleanup:
  stage: deploy
  variables:
    PROJ_ENV: staging
  image: alpine/k8s:1.27.4
  before_script:
    - if [ $PROJ_ENV == "production" ]; then export KUBECONFIG=$KUBE_CONFIG_PROD ; else export KUBECONFIG=$KUBE_CONFIG_STAG ; fi
  script:
    - helm delete --namespace="workshops-${PROJ_ENV}" "${PROJ_ENV}-${CI_PROJECT_NAME}-${CI_PROJECT_ID}"
  only:
    - master
  when: manual
Commit changes wait till it will go to the manual jobs and run them one after another, and insterad of the staging please choose cleanup.
In the cleanup job in our current pipeline we should see this:
1
2
3
4
5
6
7
8
Running with gitlab-runner 16.3.0 (8ec04662)
  on gitlab-runner-bf79f759d-9xgcm k9s1JGXC, system ID: r_TNb3aMOHeJHC
....
$ helm delete --namespace="workshops-${PROJ_ENV}" "${PROJ_ENV}-${CI_PROJECT_NAME}-${CI_PROJECT_ID}"
...
release "staging-book-frontend-50493637" uninstalled (1)
Cleaning up project directory and file based variables 00:00
Job succeeded
| 1 | You should see that your release was uninstalled. |
QnA
Waiting for Questions :)
![]() This work is licensed under a Creative Commons Attribution 4.0 International License
This work is licensed under a Creative Commons Attribution 4.0 International License